Basket liner with ruffle and ribbon ties.

completed basket 300x224 Basket liner with ruffle and ribbon ties.

I always have sewing projects sitting around my house so I wanted a basket to keep them from cluttering up my living room. I saw these basket liners in a recent issue of Country Living magazine and decided to make one.  This is an easy way to dress up a plain basket and can be ”dressed up”  in many different ways.  This was a really fun project and I plan to make several more.

Materials;

  • 1 yard of lightweight cotton fabric
  • basket
  • 2 yards of ribbon
  • pattern paper or tissue paper

wrap basket with paper to make pattern 150x150 Basket liner with ruffle and ribbon ties. make sure paper sticks up 2 inches so it will over hang 150x150 Basket liner with ruffle and ribbon ties. make pattern for bottom of basket as shown 150x150 Basket liner with ruffle and ribbon ties. add a seam allowance 150x150 Basket liner with ruffle and ribbon ties.

Step 1.

Make a pattern by wrapping the outside of your basket as shown.  Allow a 2 inch overlap to allow for hems and two inches over the top to fold over and attach a ruffle.  To make a pattern for your bottom piece press the paper down and draw a line all the way around the bottom of the basket.  When you cut it out allow an extra 5/8 ” all the way around for the seam allowance when you attach the bottom to the side pieces.

pattern piece should look about like this and you will cut out two of them 150x150 Basket liner with ruffle and ribbon ties.

Step 2.

After you cut out your long side piece fold it in half and then cut it so that you have two shorter pieces instead of one long piece.  Cut out your bottom piece and then cut two pieces for a ruffle.  The ruffle will be made from two 4″ wide pieces that are the same length as your long side piece before you cut it. 

finish all four sides as shown 150x150 Basket liner with ruffle and ribbon ties. pin side pieces to bottom as shown2 150x150 Basket liner with ruffle and ribbon ties. it should look like this when both sides are pinned to bottom 150x150 Basket liner with ruffle and ribbon ties.

Step 3. 

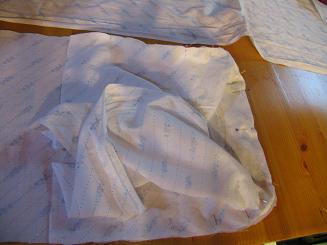
Fold over all four edges of side pieces as shown and stitch.  Pin the two side pieces to the basket bottom , right sides together, as shown. 

stitch all the way around using a 5 8 inch seam allowance 150x150 Basket liner with ruffle and ribbon ties. stitch corners as shown 150x150 Basket liner with ruffle and ribbon ties.

Step 4.

Using a 5/8″ seam allowance stitch the sides to the bottom piece.

fold over piece of fabric you cut for ruffle and press 150x150 Basket liner with ruffle and ribbon ties. using a long basting stitch gather fabric to make ruffle 150x150 Basket liner with ruffle and ribbon ties.

Step 5.

Fold your ruffle pieces in half putting wrong sides together.  Press. Using a basting stitch sew 5/8″ from edge to gather the fabric as shown.

pin piping along stitch line of ruffle as shown 150x150 Basket liner with ruffle and ribbon ties.

Step 6.

Pin piping to ruffle as shown.  Stitch as close to piping as you can.

now pin ruffle to side piece making sure piping is placed against right side of fabric 150x150 Basket liner with ruffle and ribbon ties.

Step 7.

Pin ruffles to side pieces, right sides together, gathering to fit. Stitch and press.

i added ribbon trim placing it up against piping and stitching it in place as shown 150x150 Basket liner with ruffle and ribbon ties. leave extra ribbon to tie bows 150x150 Basket liner with ruffle and ribbon ties.

Step 8.

Place ribbon along piping leaving enough at both ends to tie a bow. Stitch into place as shown.

basket lining should look like this 150x150 Basket liner with ruffle and ribbon ties.

Basket lining should look like this when you’re finished.

inside view 150x150 Basket liner with ruffle and ribbon ties. completed basket2 150x150 Basket liner with ruffle and ribbon ties.

Place the basket liner into basket and tie into place as shown.

Not2Crafty Shopb Basket liner with ruffle and ribbon ties.

About Elaine Kazinec

I have never met anyone who can't make wonderful things for their homes, friends, and family, only those who think they can't. The purpose of this blog is to show everyone how really simple most projects for the home are to make. When my husband and I bought our first home we were short on cash so I learned to be long on creativity. I have been told that I can make something wonderful out of nothing and that is true. You can too! Some of my favorite things are items that I found in someone's junk pile. I am going to show you how easy it really is. I hope you find the courage to jump in and attempt some of these projects. You will be amazed at how talented you really are.