
I made this reindeer using my dogs face that is printed on fabric paper. This is really very easy and will be a decoration you’ll enjoy for years! This would also make a great gift for the pet lover in your life.
Materials:
- one piece of fabric paper
- twigs
- small piece of soft cotton canvas
- paint
- stuffing

Step 1.
Print up a picture of your dogs face using fabric paper and your printer. Cut it out leaving a seam allowance all the way around. I usually use a quarter inch but you might want to leave a half inch if you don’t sew a lot. That will give you a little more fabric to work with.


Step 2.
Cut out a piece of the canvas fabric using your face piece as a pattern. Put the two pieces together (right sides together) and stitch all the way around leaving the neck edge open to turn it and for stuffing. Turn it to outside.


Step 3.
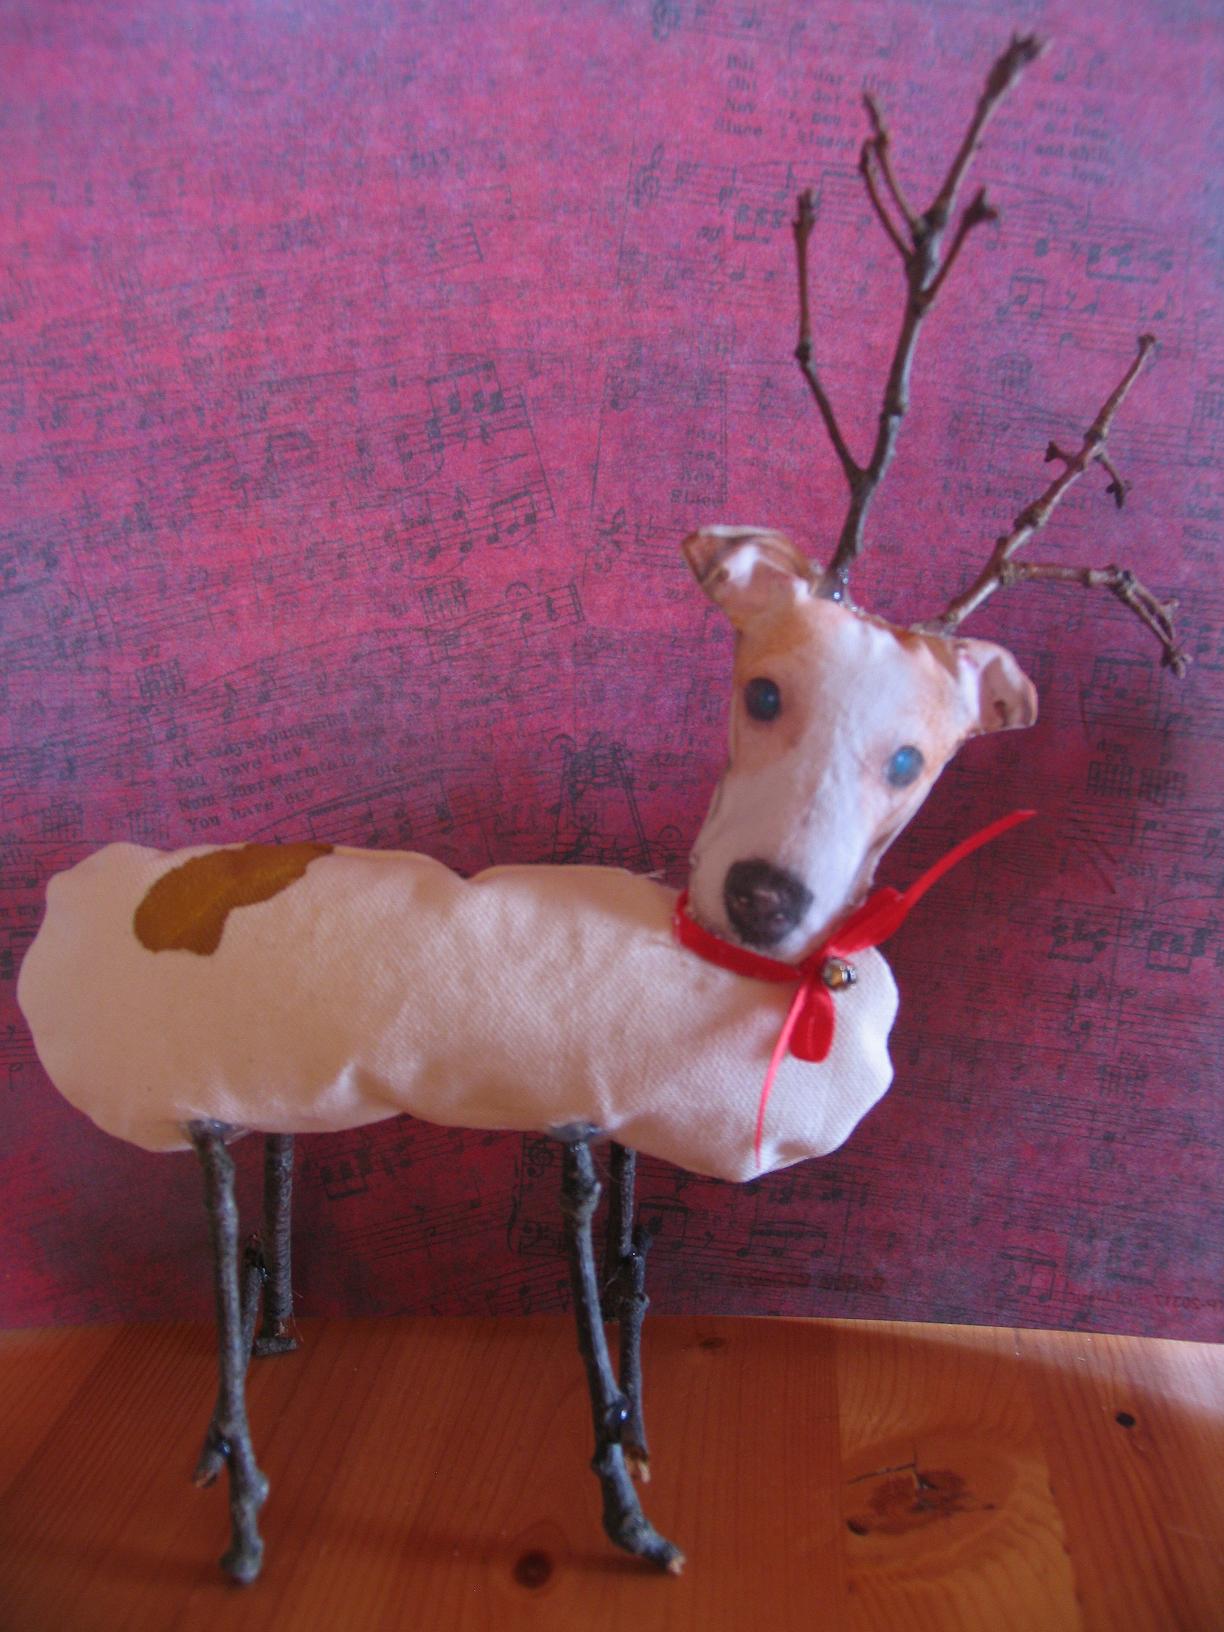
Stuff the head loosely through the opening at the neck as shown. Stitch it closed.


Step 4.
My dog is kind of long and has a big chest and skinny back end. ( He is Jack Russell and Italian Greyhound which means he is hyper and fast….) You can make your body pattern to match your dogs shape or just copy this one. This doesn’t have to be perfect but I always draw it out on scrap paper until I’m satisfied with it. Cut two pieces from the canvas fabric and then stitch them together (right sides together) leaving an opening to turn and stuff. Turn to outside and stuff. Stitch opening closed.

Step 5.
Stitch the head to the body as shown.


Step 6.
Poke four holes in the underbelly of the reindeer using a pair of sharp pointed scissors or an ice pick. Cut four sturdy twigs and poke one in each hole. Secure with a bit of hot glue.


Step 7.
Glue a twig across the legs as shown. This will stabilize the legs.

Step 8.
Cut some branched twigs to use as antlers. Poke two holes in the top of the head and then stick the twigs in the holes and secure with glue.

Step 9.
Draw on spots to match your dog and fill in with paint. I added a ribbon collar and bell but you could also use a piece of leather for a collar and make a tag with your dogs name on it.
Leave a Reply