
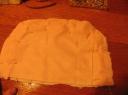
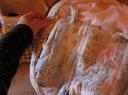
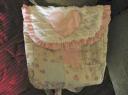
I made these backpacks for my grandaughters to use on a recent plane trip. They were small enough for them to manage but big enough to hold their toys. If you have general sewing skills this will be an easy project but even someone who is inexperienced could make this. I used part of a quilt that I had cut up to make pillow shams. (I sometimes buy a twin sized quilt for this purpose because it’s usually cheaper than buying the pre made pillow shams. I’ll show you how easy it is to do this sometime soon. )
Materials:
1 yard of fabric for the body and straps of the backpack.
1 1/2 yards of contrasting fabric for ruffle and facing for flap. If you want to use a pre gathered lace instead of making a ruffle you would just need a small remnant of contrasting fabric.
One package of double fold bias tape.
A small piece of velcro.
If you want to put an applique on the front of the backpack you will need a small piece of fusing fabric.

Step 1.
Cut out two pieces of fabric measuring 11″ x 11″. One piece will be used for the front of the backpack and the other for the back. Cut another piece measuring 33″ x 5″ to be used for the bottom and sides of the backpack.
Step 2.
Cut two pieces of fabric measuring 5″ x 36″. These will be used for the straps. Cut a piece of fabric 11″ x 6″ for the flap and another for the facing which will be cut from a contrasting fabric. You will need to round off the bottom edge of these pieces. An easy way to do this is to trace a round edge using a small plate for a pattern. Cut another piece of fabric a yard and a half long and 3 inches wide to use for a ruffle around the backpack flap.
Step 3.
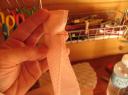
Fold the ruffle piece in half, wrong sides together. Stitch a 5/8 inch seam using a basting stitch along the edge. Carefully pull one of the two threads which will gather the fabric and create a ruffle. ( You can also buy a piece of pre gathered lace to use instead of making your own ruffle.) I decided to applique a heart onto the backpack flap but you can skip this step or cut any shape you like. If you decide to do this just cut out your shape from fabric and fusing material then iron it onto the flap following the instructions that come with the fusing fabric. Then you can stitch around the applique using a zigzag stitch on your machine or do an embroidery edging stitch by hand. You will need to do this before you apply the facing or the stitching will show through.

Step 4.
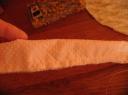
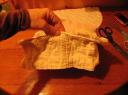
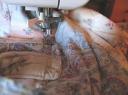
Place the ruffle along the top of the flap and adjust it to fit as shown in the picture. Stitch it into place.
Step 5.
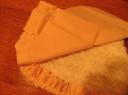
Take flap lining and put it on top of the flap putting right sides together as shown in the pictures. Stitch along the edge using a half inch seam allowance. Leave the flat end open so that you can turn the flap inside out. Press with a hot iron.
Step 6.
Pin the side piece to the front piece, right sides together. Stitch together using a 5/8 inch seam allowance. Repeat this step to attach the back of the backpack to the side piece.

Step 7.
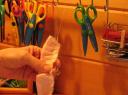
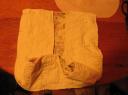
Fold the strap in half, right sides together. Stitch along the edge using a 5/8 inch seam allowance. Using a large safety pin, turn the strap inside out.

Step 8.
After turning the strap stitch along each edge using a 1/4 inch allowance. This will allow the strap to lie flat.

Step 9.
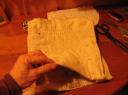
Take double fold seam binding and pin it into place over the top of the backpack to cover the raw edge. Stitch it into place.
Step 10.
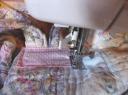
Pin straps to backback as shown in picture. Stitch into place going back and forth several times to secure the straps to backpack and prevent it from coming loose.
Step 11.
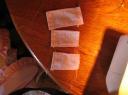
Cut three pieces of one of the fabrics that measure 4 x 2″. Hem the edges all the way around by turning under 1/4 of an inch. Place one over each of the spots where you have attached the straps. This covers the raw ends and makes the straps more secure. I attached a small piece of velcro to the flap and the backback to close it but you could also use a button and buttonhole or a loop and a button.
Maybe a bit off topic but ever tried to do something like snowboarding with cheap gear?
Fred,
I’m presuming that you are referring to cheap snowboarding gear, like back packs, warm clothing, etc… To answer your question, no I haven’t thought about doing any projects involving those, but thanks to you I will certainly consider looking into it. Thanks!
What a terrific project. Creativity often springs from difficult situations. I’m sure that the some of the most beautiful examples of early quilts arose from the woman of the house having to use what she had on hand. Thanks for going to the trouble of using the pictures with the text.