

Waiting for Halloween is so hard for the little ones so this countdown wall hanging can help them understand how many days they have to go until the big day arrives. I hand stitched mine but you can use fabric glue or hot glue to put it together a lot faster.
Materials:
- felt (the amount you use will be determined by how big you want your chart to be.) I used 1 1/4 yard of black, 1/2 yard of green, 1/4 yard of white, and a 1/4 yard of orange.
- dowel
- wooden end pieces that can be purchased at any craft store. Make sure the holes are the right size for the dowel you purchase. I usually buy the dowel and ends at the same time so I can fit them at the store.
- stencils and pattern for numbers and letters
- needle and threat or glue


Step 1.
I found the pattern for my numbers in a Halloween craft book and then photocopied the page. I used a stencil to trace the letters onto paper and them used the paper as the pattern. I decided to back mine with another color so I first cut out the letters in green and then pinned them onto a piece of orange felt and then cut around the letters making the orange letters just slightly larger than the green.


Step2.
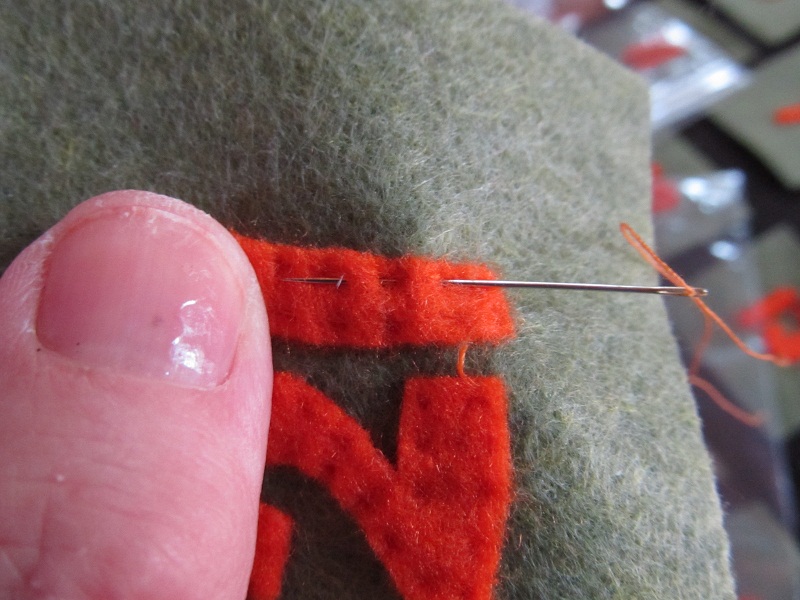
Cut out your piece of black felt to the size you would like your finished countdown chart to be. You will measure across to determine how big your pockets should be. The easiest way to do this is to cut a strip of felt that fits across the first row. I made my pockets about 3 inches deep so I cut a piece of green felt that was 3 inches deep and just a little bit shorter than the black background piece. Then I cut it into 5 equal pieces and then trimmed a little off of both sides so that the black background will show through. I used one of those pieces as a pattern and cut out a total of 31 pockets. I then cut another 31 pockets out of orange felt but made them just slightly bigger so the orange would show behind the green. You don’t have to do this but it does give it more depth. Next you will either stitch or glue the numbers onto the green pockets. Then sew or glue the green pockets onto the orange pockets.

Step 3.
Lay out your pockets as shown. Pin them into place and then stitch or glue them onto the background.


Step 4.
After you cut out all your letters sew or glue the green letters on top of the slightly bigger orange letters. Pin the letters on the top of the black felt piece as shown. Attach by sewing or using glue.


Step 5.
Cut some strips of orange felt that are about 1 1/2 inches wide and about 4 inches long. Fold them in half and stitch or glue them to the bottom. Fold over about 2 inches at the top and stitch or glue it to form a sleeve for the dowel.


Step 6.
Cut your dowel just a little longer than the top and bottom. Leave just enough sticking out to glue on the dowel end caps. Paint the dowel and caps and then slip them into the tabs on the bottom and the sleeve at the top.


Step 7.
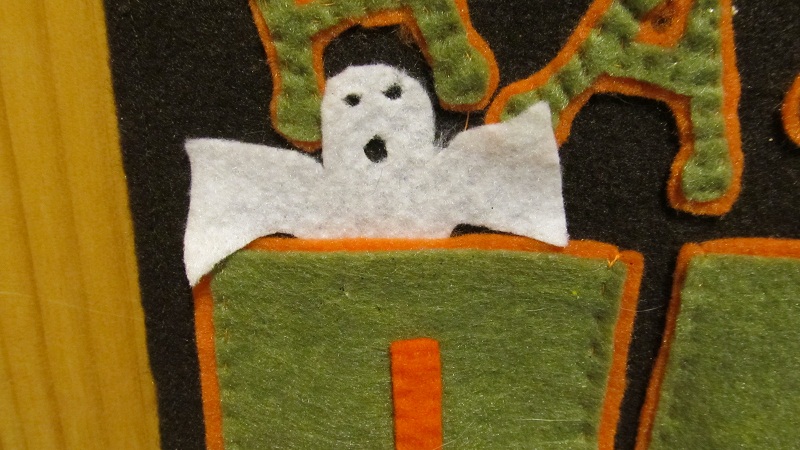
Tie a string onto the dowel to hang. Cut out 31 ghosts from the white felt. Slip one in each day until Halloween.
Leave a Reply