

This lemonade stand is designed to be taken apart and placed in a bag so that it is completely portable. It’s made from pvc pipe and is easy to make with just basic skills. A lemonade stand is a great way to help your children learn about business and provides an opportunity to earn some spending money while having fun.Â
Materials:
- 45 ft of 3/4 inch PVC pipe
- 6 elbow connectors
- 12 T connectors
- 2Â four way connectors
- 3 yards of 60″ vinyl backed canvas (Wal Mart fabric sells it for $3.97 per yard but you can find it at almost any fabric store. )
- glue ( I use Gorilla glue )
- 2 yards of 60″ canvas type fabric for bag
- Small vinyl numbers ( you can get these in a scrapbooking store )
- two 1″ X 6″ pine boards for counter top

Step 1.
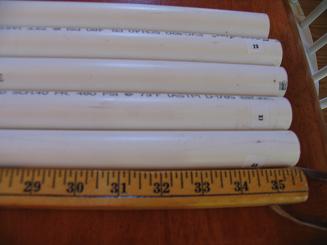
Mark pvc pipes as follows:
- five pieces @ 3ft
- six pieces @ 30″
- two pieces @ 11 1/2″
- four pieces @ 6″
- four pieces @ 12″
- four pieces @ 2″


Step 2.
Using a chop saw, hack saw, or pipe cutter make cuts as follows:
- Cut four 6″ pieces of pvc pipe. Number these 1,2,4, and 6.
- Cut six 30″ pieces of pvc pipe. Number these 12,13,14,15,32, and 33.
- Cut five 36″ pieces of pvc pipe. Number these 11,23,31,37, and 43.
- Cut four 2″ pieces of pvc pipe. Number these 17,21,25, and 29.
- Cut four 12″ pieces of pvc pipe. Number these 19,27,35, and 41.
- Cut two 11 1/2″ pieces of pvc pipe. Number these 39 and 45.


Step 3.
- Label the T connectors with 1,3,5,6,8,10,22,24,34,36,38, and 40.
- Label the elbow connectors with 18,20,26,28,42, and 44.
- Label the four way connectors with 16 and 30.


Step 4.
Glue pieces together as follows:
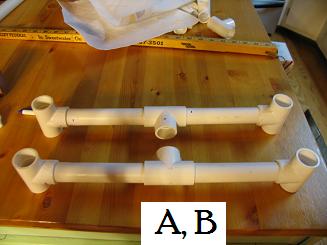
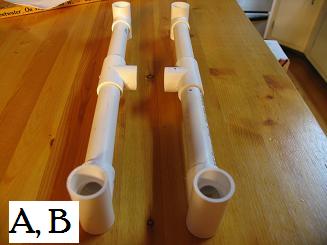
- Â A. 1 to 2, 2 to 3, 3 to 4, and 4 to 5.
- Â B. 6 to 7, 7 to 8, 8 to 9, and 9 to 10.
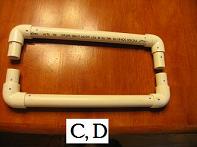
- Â C. 17 to 18, 18 to 19, 19 to 20, and 20 to 21.
- Â D. 25 to 26, 26 to 27, 27 to 28 and 28 to 29.
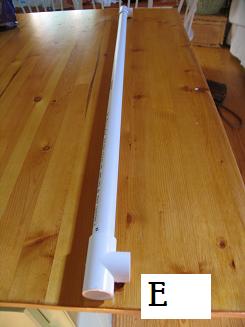
- Â E. 22 to 23 and 23 to 24.
-  F. 30 to 31, and 31 to 16.
- Â G. 39 to 42.
-  H. 44 to 45.
-  I. 40 to 41, and 41 to 38.
-  J. 34 to 35 and 35 to 36.Â
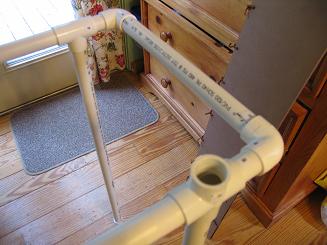
 These are all the pieces you should have when you’re finished.
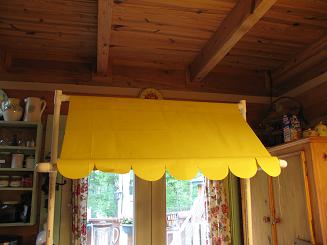
Awning and front and side flaps for lemonade stand.
 All of these measurments apply for fabric that does not need a hemmed edge. If you are using fabric that needs hemmed you should add a seam allowance all the way around.Â
Step 1.
Cut four pieces of fabric as follows:
- 34″ X 34″
- 34″ X 11″
- 34″ X 11″
- 30″ X 34″


Step 2.
Using the piece of fabric that is 30″ X 34″ make a scalloped edge at the bottom of the 30″ length. The easiest way to make the scallop is by using a lid, plate, or anything that is round and can be traced around. Start at the edge and trace halfway around the circle. Move the circle over and repeat all the way across as shown in photo.


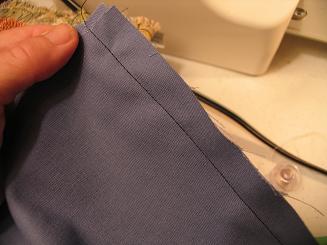
Step 3.
Fold the scalloped edge back six and a half inches right sides together. Measure down two inches from top edge and mark at several points. Draw a line by laying a ruler along the marks you have made. This gives you a line to sew on which will become your bottom pocket for the pvc pipe to slide into. After you sew it, turn the scalloped edge down and then stitch along the seam line which will help the scallop lay flat. ( See above photo. )
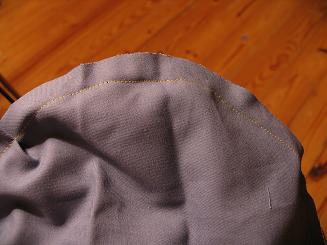
Next you will turn down four inches from the top, right sides together, and stitch along the bottom edge.


Step 4.
Now take the remaining three pieces of fabric and fold back two and a half inches at the top. Stitch along the edge as shown. Â
Assembling the lemonade stand.

Step 1.
Connect A and B with piece #11.

Step 2.
Take pieces 12, 13, 14, and 15 and place them in the top of the T connectors as shown.

Step 3.
Take pieces E  and F and place on top of the poles as shown. The four hole connectors (F) will be used for the front of your stand and (E ) for the back.


Step 4.
Take pieces C and D and attach to ends as shown above.

Step 5.
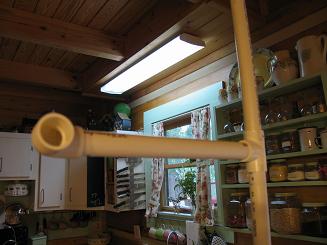
Insert piece # 32 into piece # 16.Â
Insert piece # 33 into piece # 30.

Step 6.
Insert # 34 (J) into # 33 and piece # 40 (I) into # 32. Â


Step 7.
Insert piece #45 (H)Â into piece #34.
Insert piece 39 (G) into piece # 40.
Â

Step 8.
Insert piece #37Â into the top pocket of awning.
Insert piece #43 into bottom pocket of awning.

Step 9.
Insert top of awning into piece #38 and #36. Â
Insert bottom of awning into piece #44 and #42.

Instructions for carry bag.
Step 1.
- Â Cut a piece of fabric that measures 55″Â XÂ 32″
- Â Cut two pieces of fabric that measures 2″ XÂ 36″
-  Cut one piece of fabric that measures 2″ X  72″
- Â Cut out an 11 1/2″ circle

Step 2.
Fold fabric in half, right sides together, so that it measures 55″ X 16″. Using a 5/8 inch seam allowance stitch along the side of bag.Â


Step 3.
Pin fabric circle to bottom of bag as shown. Stitch into place using a 5/8 inch seam allowance. Â


Step 4.
Narrow hem the top of bag as shown. Now turn over 2 1/2 inches, right sides together, on top of bag. Stitch into place along edge.Â
Now stitch again 1 inch from top as shown to form a casing for the drawstring.
Using a seam ripper carefully make a small opening in the seam of the top of bag to thread the drawstring through.Â


Step 5.
Fold 2″ fabric strips in half (right sides together) and then stitch 1/4 inch from edge as shown.Â
Turn inside out by pulling a safety pin through the casing as shown.
Using a safety pin, pull the drawstring through the opening you made in the casing on the top of the bag.Â
For the counter top lay the two pine boards across the top.Â
To stabilize the stand you can use dowels or rebar by driving them into the ground and placing the pvc pipe legs on top of them. Do this by putting down the base first and then driving the dowel or rebar into the ground through the holes in the T connectors. Then place the pvc pipes from step # 2 over them. If you’re setting it up on concrete you can just tie the frame to something solid. It stands up pretty well on it’s own but because children may accidentally bump into it I recommend stabilizing.Â


To pack up lemonade stand lay the awning out flat with the poles inside the casings. Place the rest of the pieces on top of the awning and roll them up inside and tie with the ties you made. Then it will easily slide into the bag.
I reconize that face anywhere!!!! see you soon. Moving there in Oct. Would love to learn how to do all that wonderful crafting…
Love ya
Wow! You have outdone yourself mom. What a great post! I’m going to dig this one.
Love,
Ryan
What is the heighth and width of the finished product.
What are the finished measurements of the stand?
It is approximately 4 ft long, 1 1/2 ft wide and 6 ft tall. It’s very easy to put together and take apart and store.
Hi! I wanted to ask if it is alright, if I link this post to an article I am writing on eHow about lemonade stands? This looks amazing!
Yes you certainly can. Thank you for visiting my site.
Hi,
I printed your instructions and went to Lowe’s and purchased the pvc for about $29. We used an old tablecloth for the awning and put it together in just a short while. This was an awesome project to do together and I am sure the kids will get tons of use out of it this summer. Thank you for such a great idea!
My grandchildren have really enjoyed theirs. We always get a lot of customers who stop because they saw the stand in plenty of time to stop!
sGWPIOmghrDetni
golvqATSOVP
KlTWohwPnAEMxuR