This past year I have had to travel across country numerous times to see my dad who is terminally ill and this project is a direct result of all that airport time. He really wanted to see my grandaughters so I agreed to bring them out but wondered how I was going to manage that by myself. I had observed young parents struggling through terminals and on planes and was more than a little apprehensive as to how to manage all the “stuff” that kids need to travel with. This project helped a lot and has me thinking about more ideas that could make airport travel a little less harrowing.
Materials:
- 1.5 yards of fabric should be enough for a small travel pillow cover, a bag for a travel blanket, and a strap to hold it all together.
- velcro
Pillow Cover
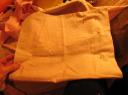

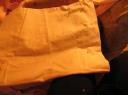
Step 1. To make pillow cover cut a piece of fabric that is slightly larger than your pillow. Cut another piece the same size. Put the two pieces together (right sides together) and sew on three sides leaving one of the short ends open as shown.

Step 2.
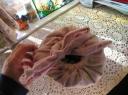
If you want to keep it simple just hem the top of the case all the way around and you’re finished. I decided to add some detail to mine so I cut a piece of fabric three inches wide and about 24 inches long to use as a decorative pleat. Fold it in half , wrong sides together, and make equal little folds all the way across the front pillow edge as shown. When you have it pinned the way you want it go ahead and stitch it through all the thicknesses being careful to keep all the edges smooth.

Step 3.
You will also need a facing so that the seam edges don’t show and the easiest way to do this is to cut a strip of fabric about two inches wide and the length of the entire pillow opening plus an extra inch to allow for a 1/2 inch seam allowance on each end of the facing. You will stitch the ends together so that it becomes a circle. Then you put the right side of the facing on top of the pleated fabric bringing all the edges together. Stitch all the way around the edge. When you fold it down your pleats should show as illustrated in the picture.
Blanket bag

Step 1.
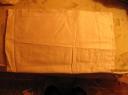
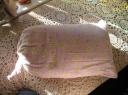
Cut a piece of fabric that is slightly larger than the size of your rolled up travel blanket. Most of them are a standard size but some are bigger so you need to measure. I used a piece of fabric that was 32 X 18 inches for mine. Fold it in half , right sides together, and stitch the bottom and side leaving the top open using a 5/8 inch seam allowance as shown in picture.

Step 2.
Stitch down the seam, as shown in picture, so that the drawstring won’t catch when you put it in.

Step 3.
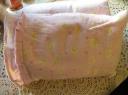
Turn down the fabric at the top (right sides together) about 1.5 inches and stitch all the way around leaving a small space to pull the drawstring through.

Step 4.
Cut a piece of fabric 2″ x 35″ then fold it in half, right sides together. Stitch it, leaving both ends open.
Step 5.
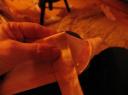
Using a safety pin clip one side of top edge and then feed it down through the fabric until it comes out the other end. Feed it through the casing on the bag and then tie a knot on each end of the drawstring.
Straps for traveling

Step 1.
Cut two pieces of fabric 6″ x 31″ and one piece of fabric 3″ x 12″. Fold them each in half and stitch leaving them open at both ends. Turn them the same as the drawstring and then stitch along both sides to make them lay smoothly.

Step 2.
Pin handle to the two long straps tucking under the raw end then stitch into place sewing back and forth several times to reinforce the strap.

Step 3.
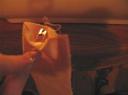
Pin velcro to ends of strap as shown. Stitch it into place.

Step 4.
Pin opposite velcro on other end of straps, lining it up so that one closes over the other.
Welcome home mom. I hope you and the girls had a nice time.