
I like to rearrange my furniture a lot and with my bed against this particular wall there was no room for my bulky nightstand. I had two small drawers than I snagged at a yard sale so I decided to create a small nightstand using them. This is really easy.
Materials:
- drawers
- screws


Step 1.
The first thing you have to do is find a drawer or drawers that will fit in the space you need to use. I found these at a yard sale (for free) but drawers are pretty easy to find at thrift stores, trash dumps, and on clean up days where people pile stuff on the street to be hauled off. Ikea sells small drawer units that are also perfect for small spaces.

Step 2.
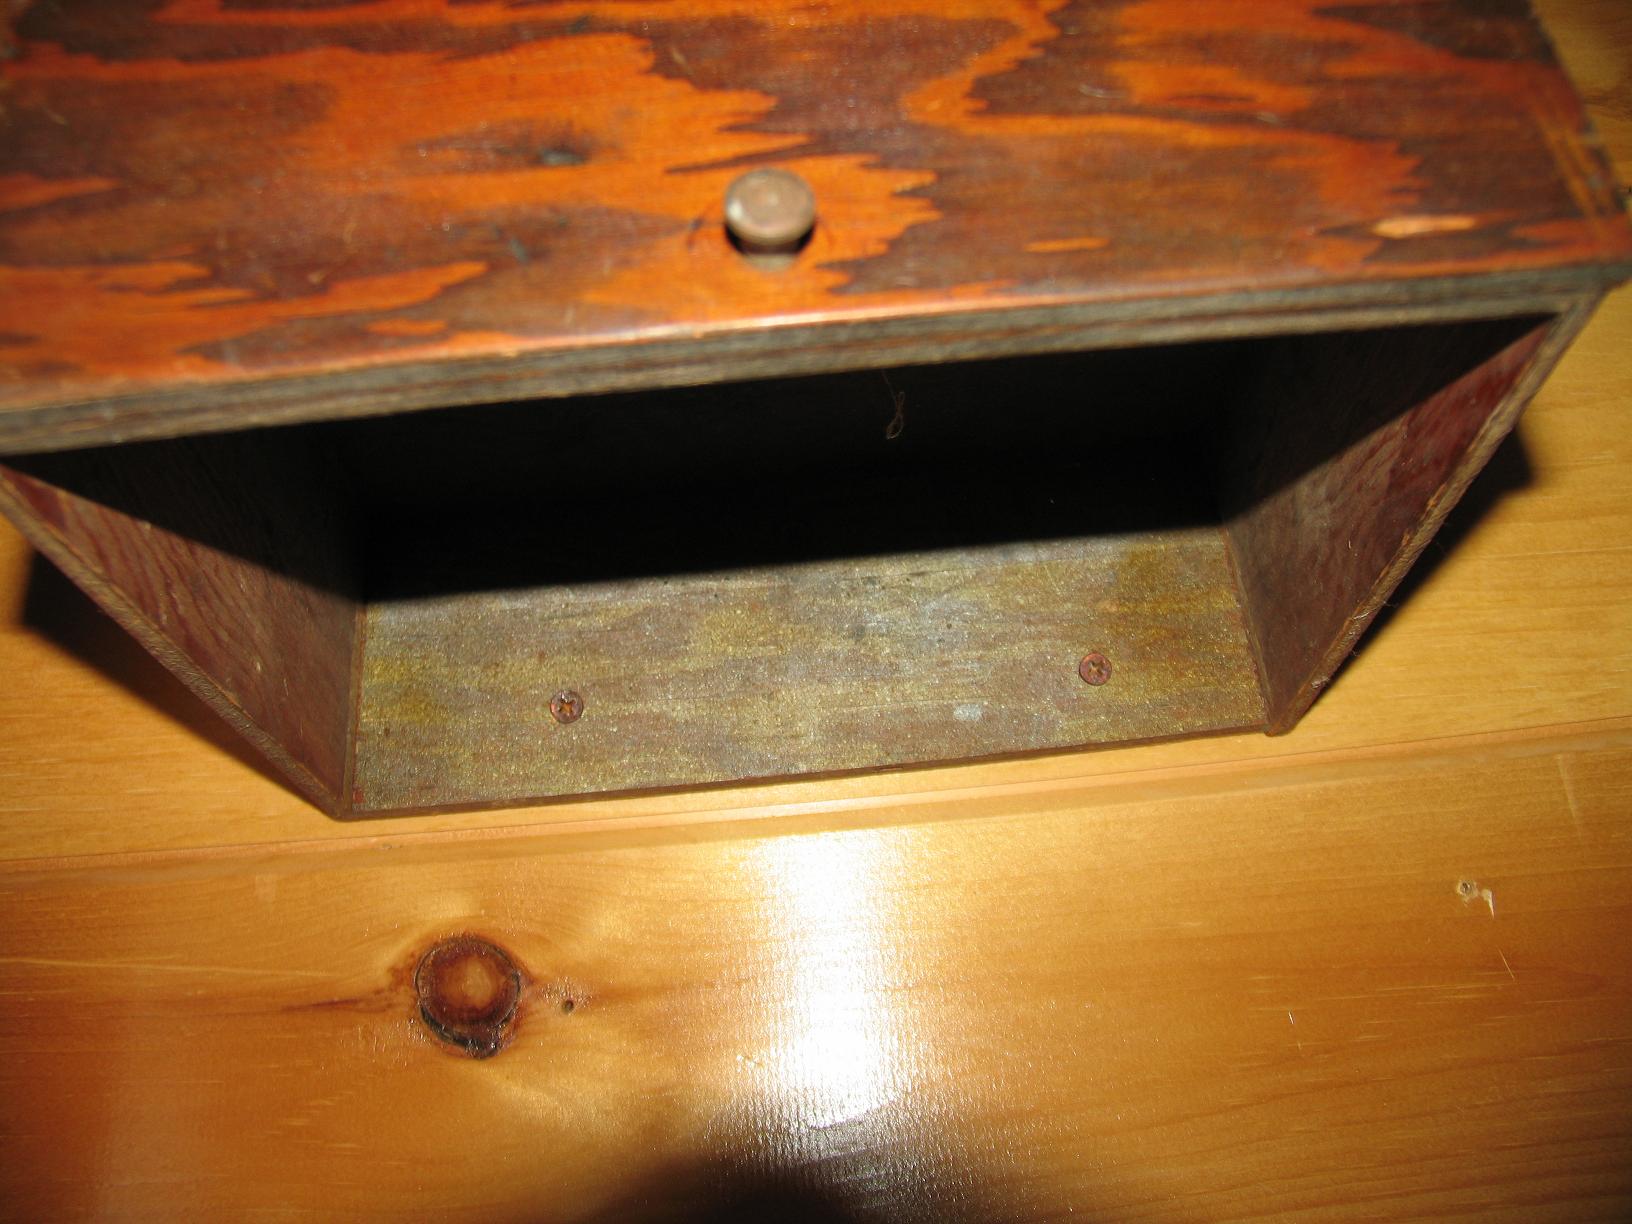
I start some small screws into the back of the drawer while I have it on the floor. Be really careful or you might put the screws in too far and go into the floor. That’s experience speaking… This will make it easier to put the drawers up. Use a ruler and tape measure to draw an even line with pencil so you will know where to place the drawers. I measure from the floor up to the position I want the drawer and draw a line. However, many homes are not square so it’s always best to use a level. Hold your drawer against the wall and place the level on top. I usually do both because my husband trained me and he’s a perfectionist.


Step 3.
I turned the first drawer upside down so I can set my lamp on it. Now obviously if you are going to put anything heavy on them you will need to make sure you are putting the screws into a stud. If you don’t have a stud there you can use molly or toggle bolts. They come with instructions and are easy to do. Keep in mind you don’t want to use them unless you’re doing something pretty permanent because they do leave a hole. I have never seen a hole that can’t be patched so keep that in mind also.

Step 4.
I turned the second drawer right side up so that I can put my phone and other stuff in it. I added a couple of small screws near the top to connect the two drawers and give them a little more stability.

Step 5.
I cut a piece of paper to fit in the bottom of the drawer.
Leave a Reply